
What Does a Great Outdoor Basketball Court Need?
A great outdoor basketball court needs five things. First, it needs accurate dimensions that match the level of play. Second, it needs a firm, stable base made of concrete or asphalt. Third, it needs a sloped surface that sheds water quickly. Fourth, it needs a durable synthetic acrylic playing surface with clear markings. Finally, it needs quality hoops, fencing and lighting that keep players safe.
If you get these five elements right, your court will play consistently for many seasons. If you rush any of them, problems appear fast. Cracks, puddles, peeling paint and uneven bounces all trace back to early planning mistakes.
This guide walks you through every stage of an outdoor basketball court project. We start with the basics and move step by step through dimensions, site selection, base construction, drainage, surfacing, markings, equipment and maintenance. Along the way, we explain why synthetic acrylic flooring has become the preferred surface for outdoor courts worldwide.
You do not need an engineering background to follow this guide. We keep the language simple and the advice practical. By the end, you will know what to ask your designer, your civil contractor and your flooring applicator. You will also understand how Raycourt’s acrylic flooring material fits into the picture.
Expert Tip: Treat your outdoor basketball court as a system, not a single product. The base, the drainage, the acrylic layers and the equipment all work together. A weak link in any one part shortens the life of the whole court.
Understanding the Outdoor Basketball Court
What Makes an Outdoor Court Different?
An outdoor basketball court faces challenges that an indoor court never meets. Sun, rain, wind, dust and temperature swings hit the surface every single day. Indoor courts sit under a roof with controlled air, so wood and sprung systems work well there. Outdoor courts need a different approach.
The surface must resist ultraviolet radiation. It must handle heavy rain without losing grip. It must also tolerate hot afternoons and cool nights without cracking. Because of these demands, designers choose materials that stay stable in changing weather. Synthetic acrylic systems meet these demands better than most alternatives.
Outdoor courts also serve more people. A school court might host physical education classes in the morning, practice in the afternoon and free play in the evening. A community court might stay open from sunrise to late night. This heavy use means the surface needs both toughness and comfort.
Who Builds and Uses Outdoor Basketball Courts?
Many groups build outdoor courts. Schools and colleges build them for students. Residential societies add them as amenities. Sports academies build them for training. Municipal bodies build them for public parks. Hotels, resorts and corporate campuses build them for guests and employees.
Each group has different priorities. A training academy cares most about ball response and player safety. A public park cares most about durability and easy upkeep. A residential society cares about appearance and low noise. Fortunately, a well-built acrylic court satisfies all of these needs at once.
Full Court, Half Court and Multi-Sport Layouts
Planners usually pick one of three layouts. A full court supports regulation five-a-side games. A half court suits practice, shooting drills and casual three-a-side play. A multi-sport court adds lines for other games, such as volleyball, tennis or pickleball, on the same surface.
Multi-sport courts make sense when space is tight. They also suit institutions that want to serve many players with one build. However, line clarity becomes critical on these courts. Each sport needs its own color so players can tell the markings apart. We cover this in detail in the line marking section below.
Outdoor Basketball Court Dimensions
Why Dimensions Matter So Much
Correct dimensions protect fairness and safety. Players train their eyes and legs on exact distances. A three-point shot from the wrong spot teaches the wrong muscle memory. A court that sits too close to a wall invites collisions. So before you pour any concrete, confirm every measurement.
Most outdoor courts follow the rules of FIBA, the international basketball federation. Some regions follow other bodies, such as the NBA or national school federations. The measurements differ slightly between these standards. Always check which rulebook governs your players, then design accordingly.
You can review official rules and equipment standards directly on the FIBA website, which remains the most authoritative source for international court specifications.
Standard FIBA Court Measurements
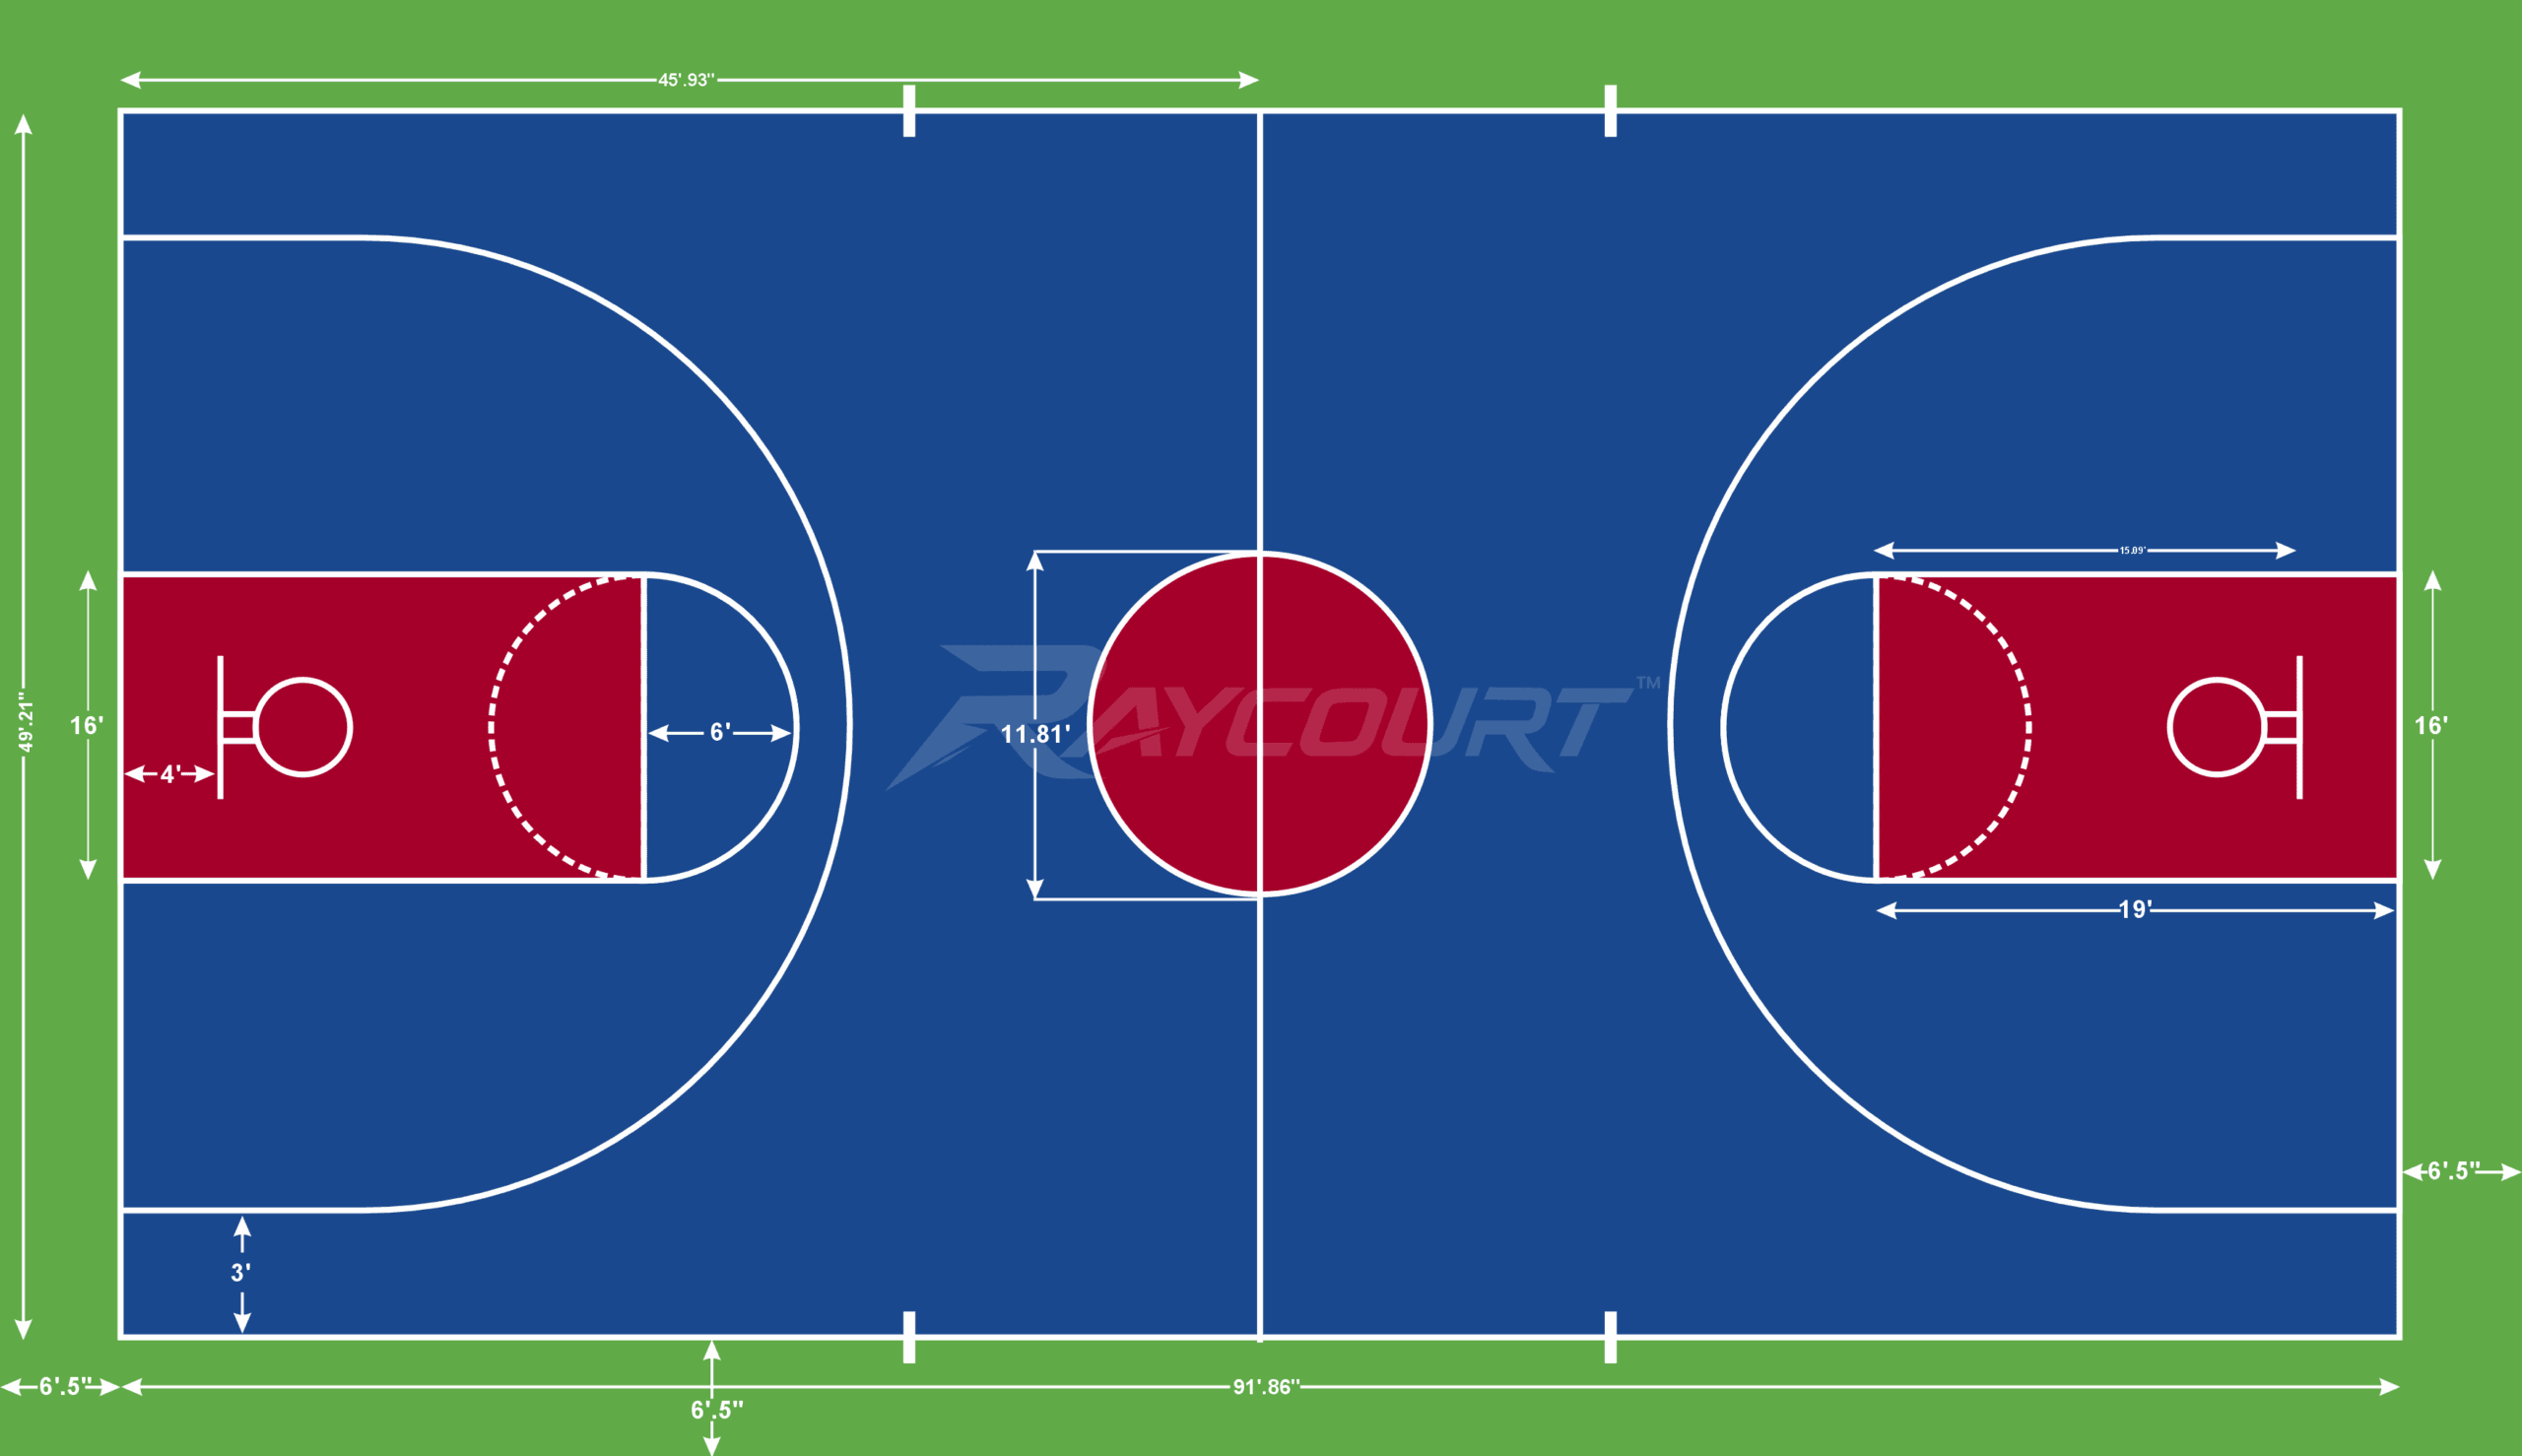
The table below summarizes the key measurements for a regulation outdoor basketball court under FIBA rules.
| Court Element | FIBA Standard |
|---|---|
| Playing court length | 28 meters |
| Playing court width | 15 meters |
| Total area with run-off space | Roughly 32 by 19 meters |
| Rim height | 3.05 meters |
| Three-point line distance | 6.75 meters from the basket |
| Free-throw line distance | 5.80 meters from the baseline |
| Free-throw lane width | 4.90 meters |
| Restricted area arc radius | 1.25 meters |
| Center circle radius | 1.80 meters |
| Line width | 5 centimeters |
| Backboard size | 1.80 by 1.05 meters |
| Rim inner diameter | 45 centimeters |
These numbers give your designer a clear starting point. Keep in mind that line width counts toward the court area, so crews must mark lines carefully.
Half Court Dimensions
A half court measures about 14 by 15 meters when you cut the regulation court at the center line. Many residential and school projects choose this layout. It fits into smaller plots and still supports serious practice. One hoop, one key and one three-point arc give players everything they need for shooting and one-on-one play.
Run-Off Space and Safety Zones
The run-off area is the clear space around the court boundary. Players often chase loose balls beyond the sideline. If a wall, pole or fence stands too close, injuries follow. For competitive play, plan at least two meters of clear space around the court. Recreational courts can use slightly less, but more space always improves safety.
Your acrylic surface should extend across the entire playing area and the run-off zone. Many designers use a contrasting color for the run-off. This approach adds visual definition and shows players exactly where the court ends.
Tips for Planning the Total Footprint
Follow these steps when you calculate your footprint:
- Add the playing court measurements first.
- Add the run-off space on all four sides.
- Add room for spectator seating, benches and scorer tables if you expect games.
- Add space for fencing, gates and drainage channels around the edge.
- Leave access routes for maintenance equipment.
Expert Tip: Always measure the diagonal of your finished base. Equal diagonals prove that your court sits square. Crews can fix a skewed layout before the acrylic goes down, but not afterward.
Ready to build a court that performs for years to come?
Connect with Raycourt for sports flooring systems built for your project.
Choosing the Right Location for Your Outdoor Basketball Court
Sun Direction and Court Orientation
Orientation affects the player experience more than most people expect. Low sun in the eyes can ruin a shot. Traditionally, designers align the long axis of the court north to south. This alignment keeps the morning and evening sun off the players’ faces during play along the length of the court.
Of course, site limits sometimes override this ideal. If your plot forces a different direction, you can still build a great court. Simply place the hoops and plan the lighting with the sun path in mind. Also consider shade trees or nearby buildings, which change the glare throughout the day.
Distance from Trees, Buildings and Roads
Trees look attractive near a court, but their roots and leaves cause trouble. Roots lift and crack bases over time. Fallen leaves stain the acrylic and clog drains. For these reasons, keep large trees well away from the court boundary.
Buildings and roads matter too. A court beside a busy road invites stray balls and noise. A court beside a building may suffer from heat reflection or restricted access. Therefore, walk the site at different times of day before you finalize the location.
Soil and Ground Conditions
Soil quality decides how well your base will last. Soft or clay-rich soil moves with moisture changes. That movement shows up later as cracks in the surface. A soil test before construction tells your civil team how to prepare the sub-base. Good compaction and a stable sub-base protect everything above them.
Sloping terrain needs special attention. Engineers must level the ground and manage the runoff carefully. In some cases, retaining walls help create a flat platform. Plan for these needs early so they do not surprise you later.
Access, Visibility and Lighting Needs
Think about how people will reach the court. Clear paths, ramps and gates make the space welcoming for everyone. Visibility also supports safety, because open sightlines discourage misuse after hours.
If you want evening play, plan the floodlighting now. Poles need foundations, and electrical lines need trenches. It is far easier to include these items in the initial design than to retrofit them later.
Building a Strong Base for Your Outdoor Basketball Court
Why the Base Decides the Life of the Court
Players see the acrylic surface, but the base does the heavy work. The base carries the load, resists moisture and holds the shape of the court. A thin acrylic coating cannot hide a weak base. Any crack, bump or dip in the base eventually appears on the surface.
Because of this, the base deserves your closest attention. Civil contractors build it before any flooring work starts. Raycourt does not install flooring, but we strongly encourage every project owner to ask their contractor about base quality first.
Concrete Base vs. Asphalt Base
Two base materials dominate outdoor basketball courts. Both work well when crews build them correctly. Each has its own strengths.
| Feature | Concrete Base | Asphalt (Bitumen) Base |
|---|---|---|
| Strength | Very rigid and long-lasting | Slightly flexible under load |
| Crack behavior | Can show shrinkage or control joint cracks | Can show surface or reflective cracks |
| Curing needs | Needs a full curing period before coating | Needs time to cure before coating |
| Surface smoothness | Needs careful finishing for a flat plane | Smooth with proper rolling |
| Best for | High-use courts and long-term projects | Flexible schedules and varied soil conditions |
Concrete Bases
A concrete base gives a rigid, stable platform. Crews lay a compacted sub-base, add reinforcement and then pour the slab. They finish the surface to a smooth, level plane with a slight slope for drainage. After pouring, the slab needs a long curing period. Many specialists wait about 28 days before applying any coating.
Moisture and alkalinity matter here. Fresh concrete releases moisture and carries high alkalinity. If crews coat too early, the acrylic can blister or peel. Patience at this stage saves enormous trouble later.
Asphalt (Bitumen) Bases
An asphalt base uses layers of compacted bituminous material. Crews build it in courses, roll each layer and aim for a dense, smooth finish. Asphalt tolerates minor ground movement better than rigid concrete. It also gives a slightly softer feel underfoot.
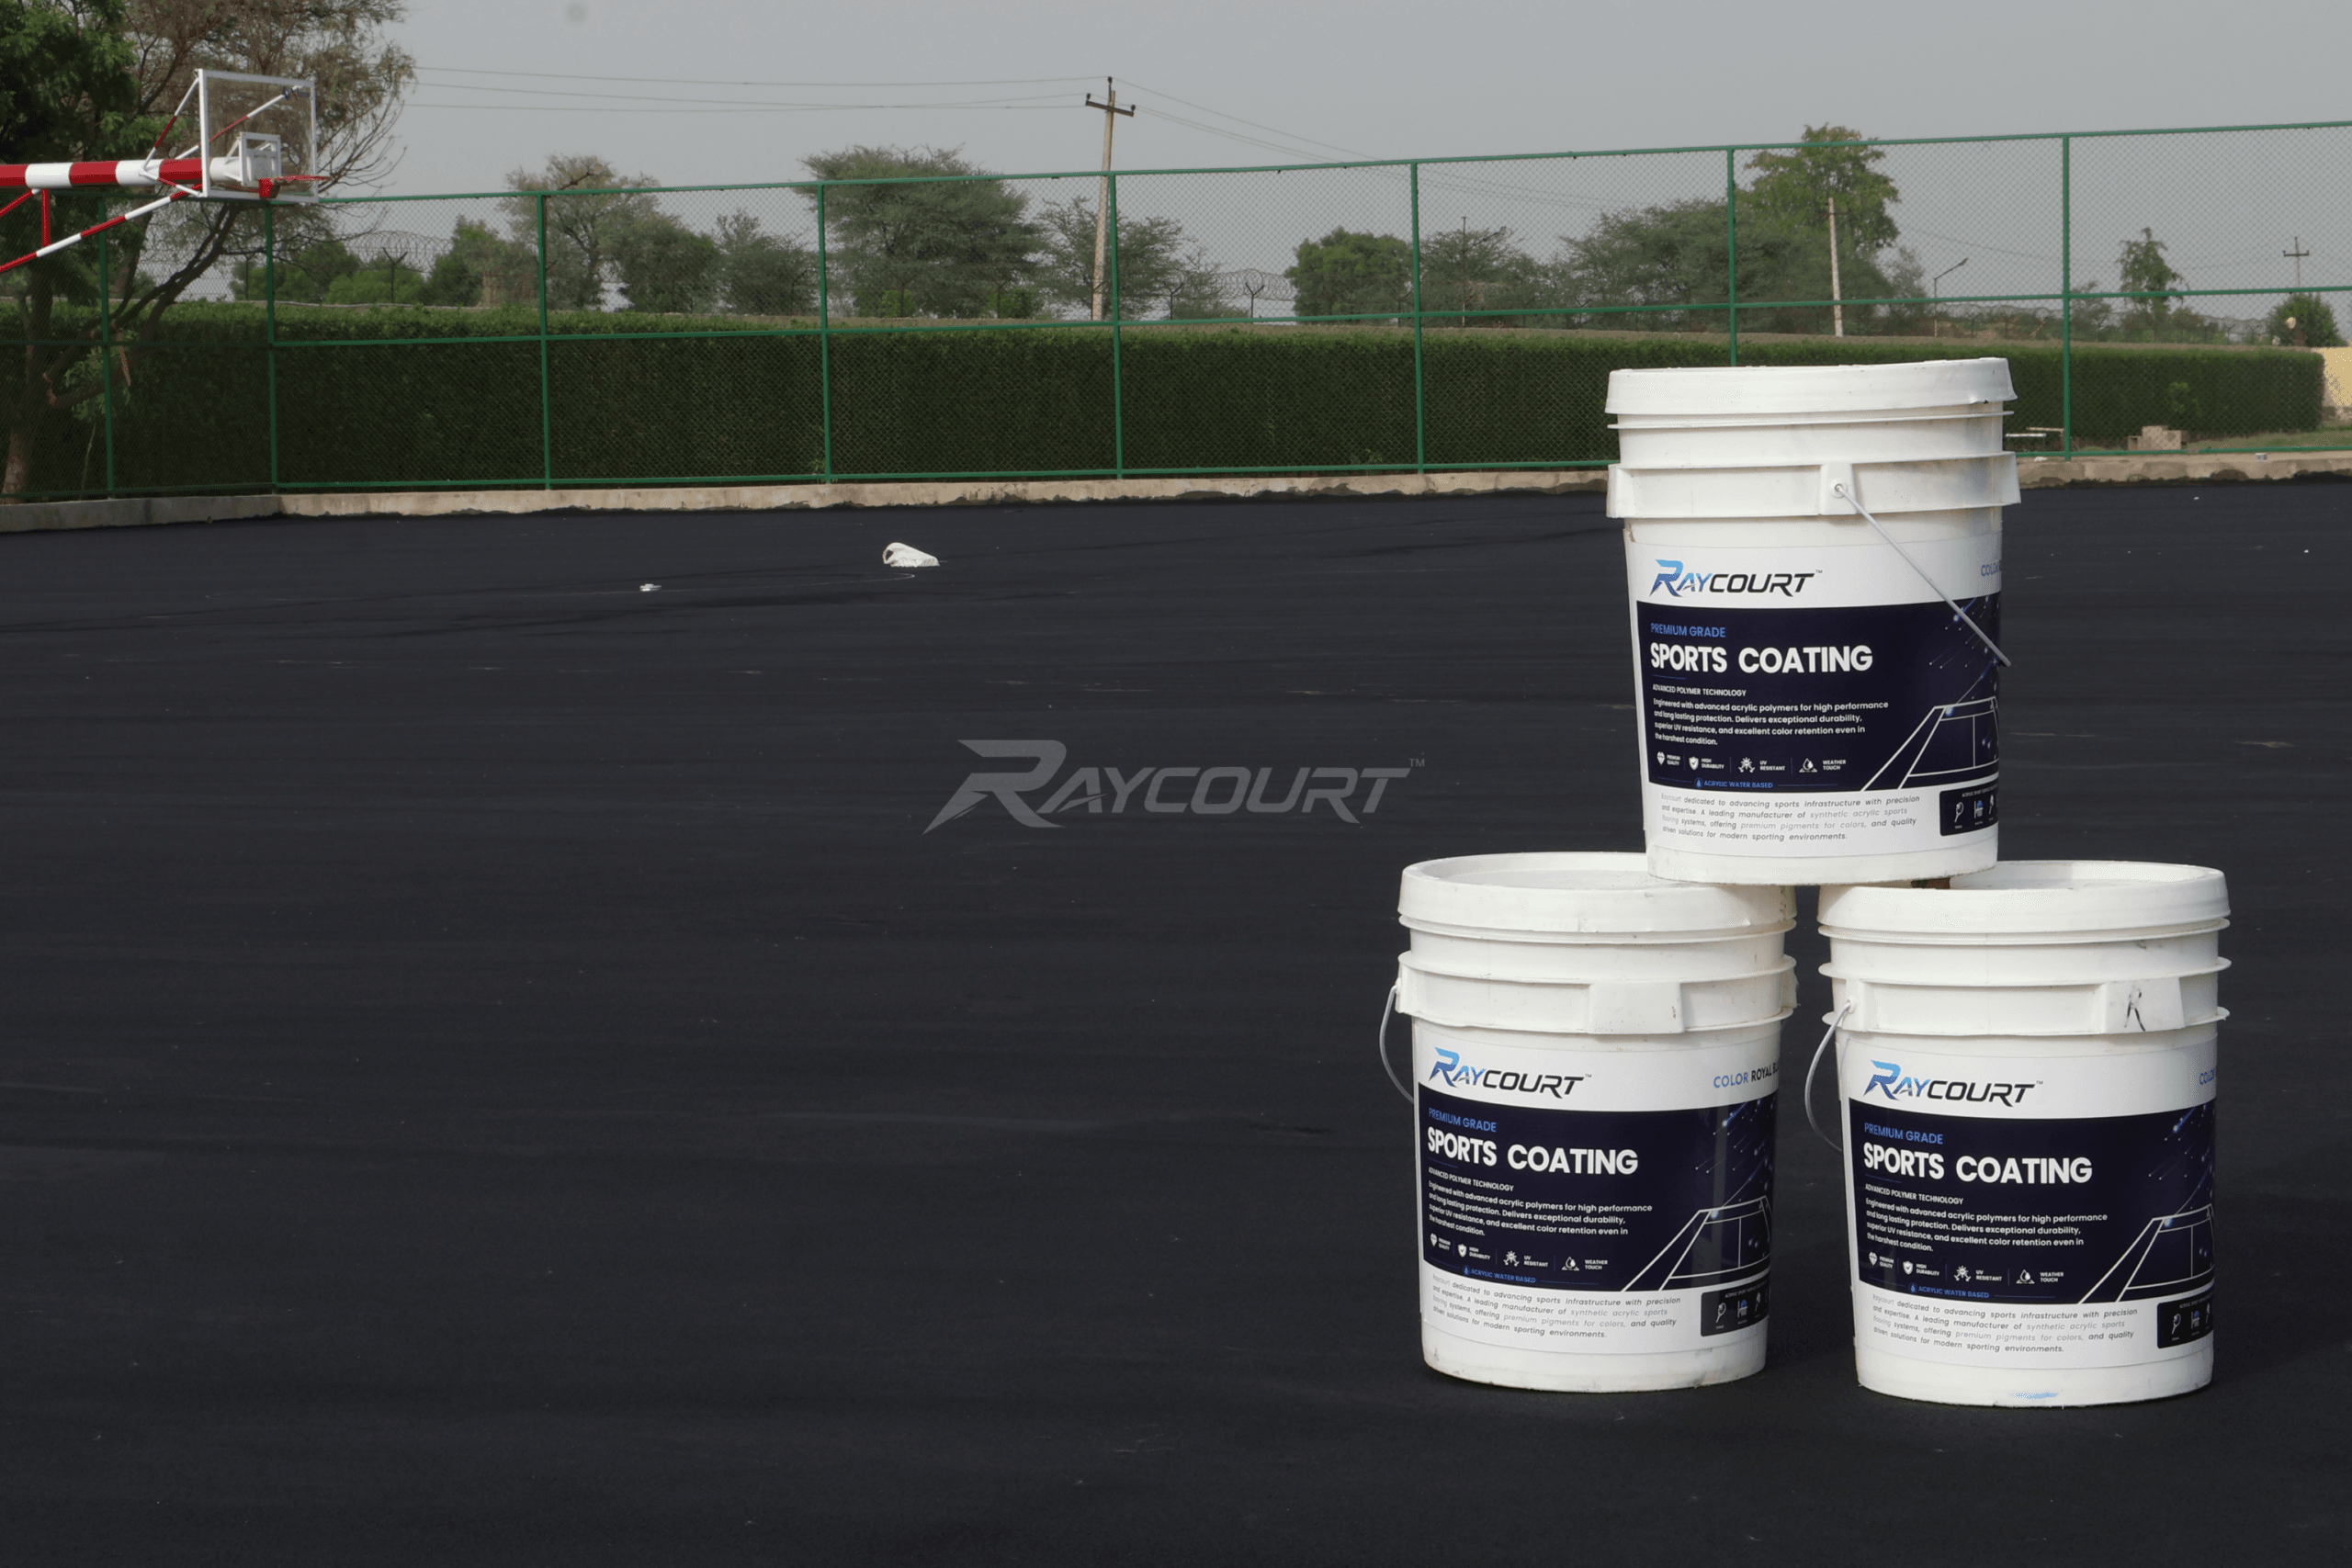
Asphalt needs enough time to cure and release oils before coating. Your contractor and flooring applicator should agree on the right waiting period. Proper surface preparation, including cleaning and filling low spots, then helps the acrylic bond firmly.
Joints and Crack Control
Every base moves a little with heat and cold. Engineers add control joints in concrete to guide cracks into neat lines. Designers must plan joint locations so they avoid key playing zones when possible. Flooring crews then treat these joints correctly before they coat the surface.
Cracks will test any acrylic system, so inspect them closely. Hairline shrinkage cracks respond well to proper filling and flexible crack repair products. Wide or moving cracks signal a deeper structural issue. Fix those problems at the base level, not with surface coatings.
Surface Flatness Tolerance
Flatness separates good courts from great ones. Players notice dips and bumps the moment they dribble. Water also collects in any low spot, which creates birdbaths. A birdbath stays wet long after rain and encourages algae growth.
Check flatness by pouring water on the finished base before surfacing. Mark every spot where water pools. Then ask your contractor to correct those areas. This simple test, often called a flood test, catches issues while repairs remain easy.
Expert Tip: Run your flood test after the base cures but before acrylic application. Water that drains within a short time tells you the slope works. Puddles that linger tell you to repair the base first.
Drainage and Slope: Keeping Your Outdoor Basketball Court Dry
Why Drainage Deserves Its Own Plan
Water is the biggest enemy of any outdoor surface. Standing water weakens coatings, stains the surface and creates slip hazards. It also invites moss and algae. A good drainage plan solves all of these problems at once.
Smart planning begins long before construction. Your design should show where water flows, where it exits and how it avoids neighboring areas. Treat drainage as an essential part of the court, not an afterthought.
The Right Slope for an Outdoor Basketball Court
Designers usually give the court a gentle slope of about one percent. That equals roughly ten millimeters of fall per meter. This slope moves water off the surface without affecting how the ball bounces or how players move. Most players never feel it.
The slope can run in one direction across the width or the length. A single-plane slope usually works better than a crowned center. It keeps the court simple, and it sends water to one side where drains or channels catch it.
Edge Drains and Perimeter Channels
Water that leaves the court needs a safe path. Perimeter channels, catch basins and grated drains collect the runoff and carry it away. Position them along the low edge of the court. Make sure the discharge point does not flood a neighboring path or building.
Keep grates clear of leaves and debris. A blocked drain defeats the whole system. Schedule regular checks, especially before the rainy season begins.
Matching Slope to Local Climate
Heavy-rain regions need more attention to drainage than dry regions. In monsoon climates, designers often add extra drain capacity and double-check the slope. In dry climates, drainage still matters, because even occasional storms can flood a flat court. Always design for the heaviest rain your location sees.
Why Synthetic Acrylic Is the Smart Surface for an Outdoor Basketball Court
The Problem with Raw Concrete and Asphalt
Many outdoor courts start as bare concrete or asphalt. Players love the bounce at first, but the downsides appear quickly. Bare concrete feels hard on joints. It wears down shoes and sheds dust. Bare asphalt heats up, softens, and loses definition on its markings. Neither surface delivers a controlled, consistent playing experience.
A synthetic acrylic coating transforms these base materials into true sports surfaces. It adds grip, color, cushioning and weather protection. It also gives the court a professional appearance that raises its value for the whole facility.
Key Benefits of Acrylic Court Surfaces
Acrylic flooring offers a long list of benefits for outdoor basketball courts. Here are the most important ones:
- Consistent ball bounce. The surface gives a predictable, true bounce across the entire court.
- Excellent traction. Texture and grit in the coating help players stop, cut and pivot with confidence.
- UV resistance. Quality acrylic holds its color under strong sun and resists fading.
- Weather tolerance. The coating handles rain, heat and seasonal changes without breaking down.
- Joint-friendly play. Optional cushion layers soften impact and reduce fatigue.
- Wide color choice. You can match team colors, school branding or facility themes.
- Easy upkeep. Smooth, sealed surfaces clean up quickly with water and mild detergent.
- Quick repairs. Crews can patch and recoat local damage without rebuilding the whole court.
These advantages explain why acrylic surfaces dominate outdoor basketball, tennis and multi-sport facilities across the world.
How Acrylic Compares with Other Outdoor Options
Other surfaces exist, but each has limits. Interlocking polypropylene tiles click together quickly. However, tile joints can shift and trap debris over time. Rubber and polyurethane systems feel soft, but they can demand more specialized care. Natural materials like clay or grass suit other sports far better than basketball.
| Surface Type | Strengths | Limitations for Outdoor Basketball |
|---|---|---|
| Synthetic acrylic | Consistent bounce, strong traction, wide color range, UV stable | Needs a sound base and periodic recoating |
| Interlocking tiles | Fast to lay, modular | Joints can shift, and ball bounce varies at seams |
| Bare concrete | Very firm | Harsh on joints, limited grip control, dull appearance |
| Bare asphalt | Smooth when new | Softens in heat, markings fade quickly |
For most project owners, acrylic offers the best overall balance of performance, appearance and long-term reliability.
Ready to build a court that performs for years to come?
Connect with Raycourt for sports flooring systems built for your project.
Raycourt’s Approach to Acrylic Flooring Material
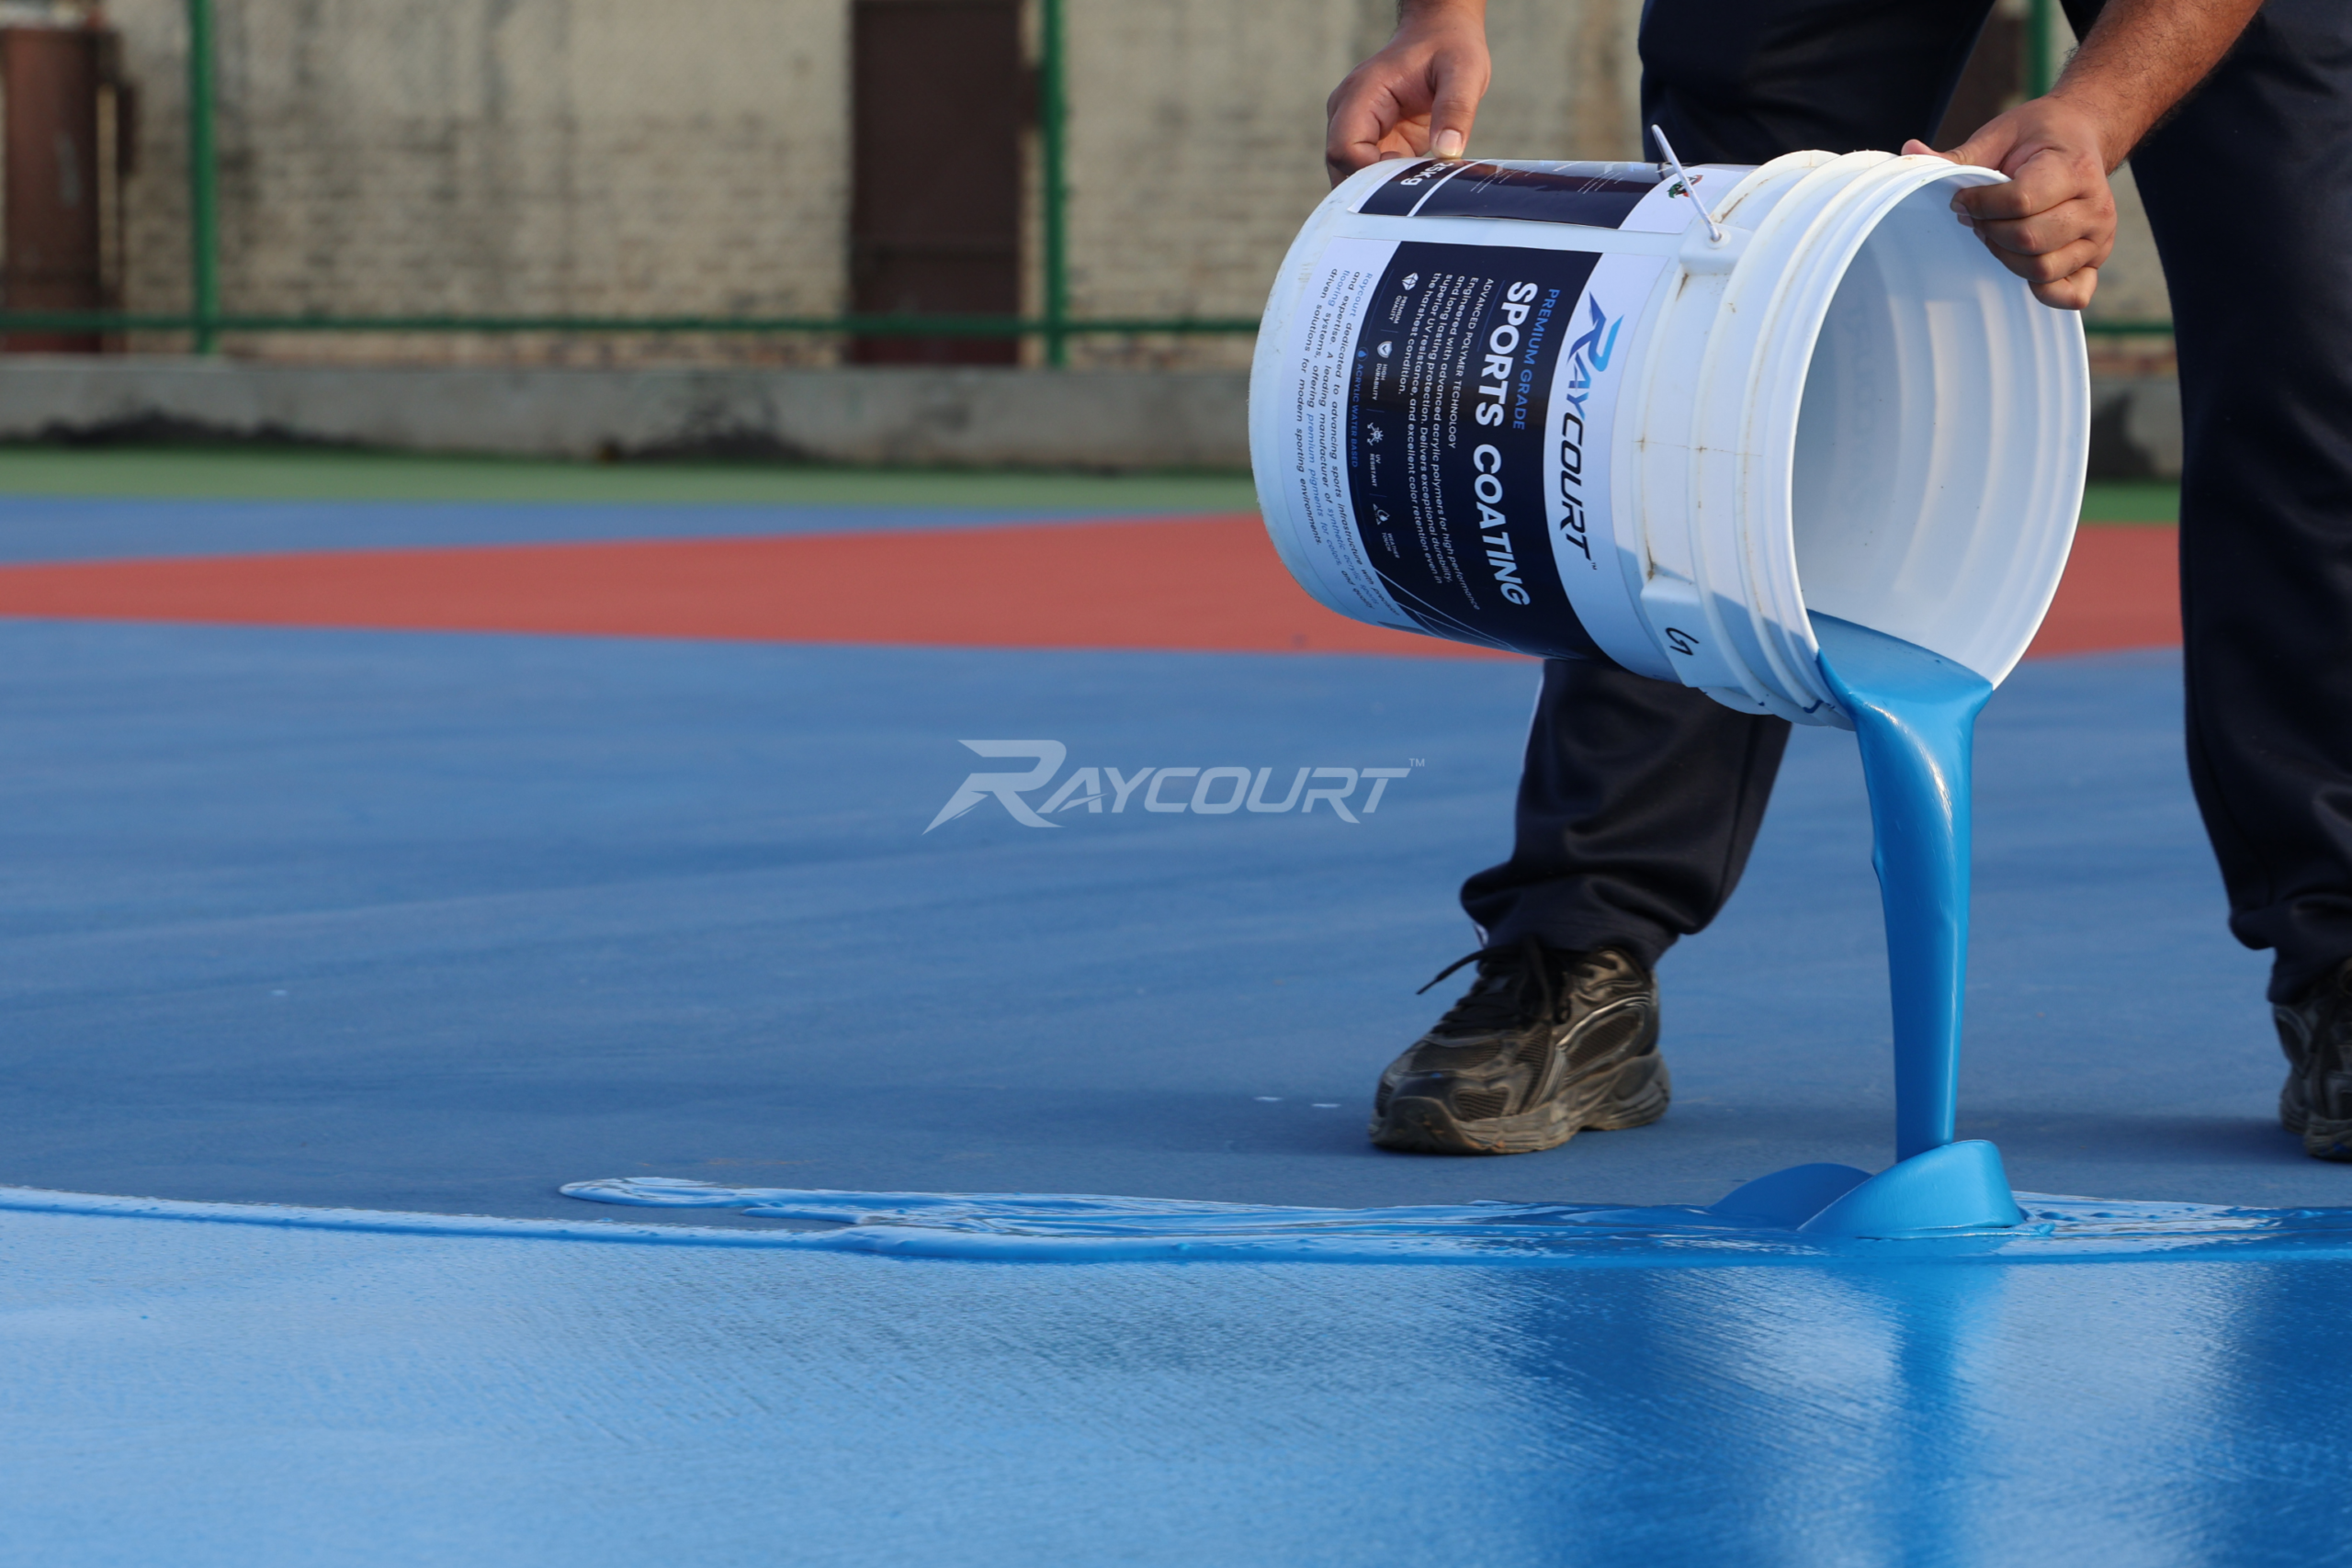
Raycourt manufactures synthetic acrylic sports court flooring material with outdoor conditions in mind. Our formulations focus on bond strength, color stability and playability. We develop each product to cover the surface evenly, resist wear and hold its appearance in sunlight.
We stay in close contact with contractors, academies and sports bodies to learn what players need on court. That feedback shapes our materials. Our flooring also carries ITF Court Pace Classified recognition, which reflects our commitment to measured, consistent surface performance across racquet and multi-sport applications.
The Layers of an Acrylic Outdoor Basketball Court
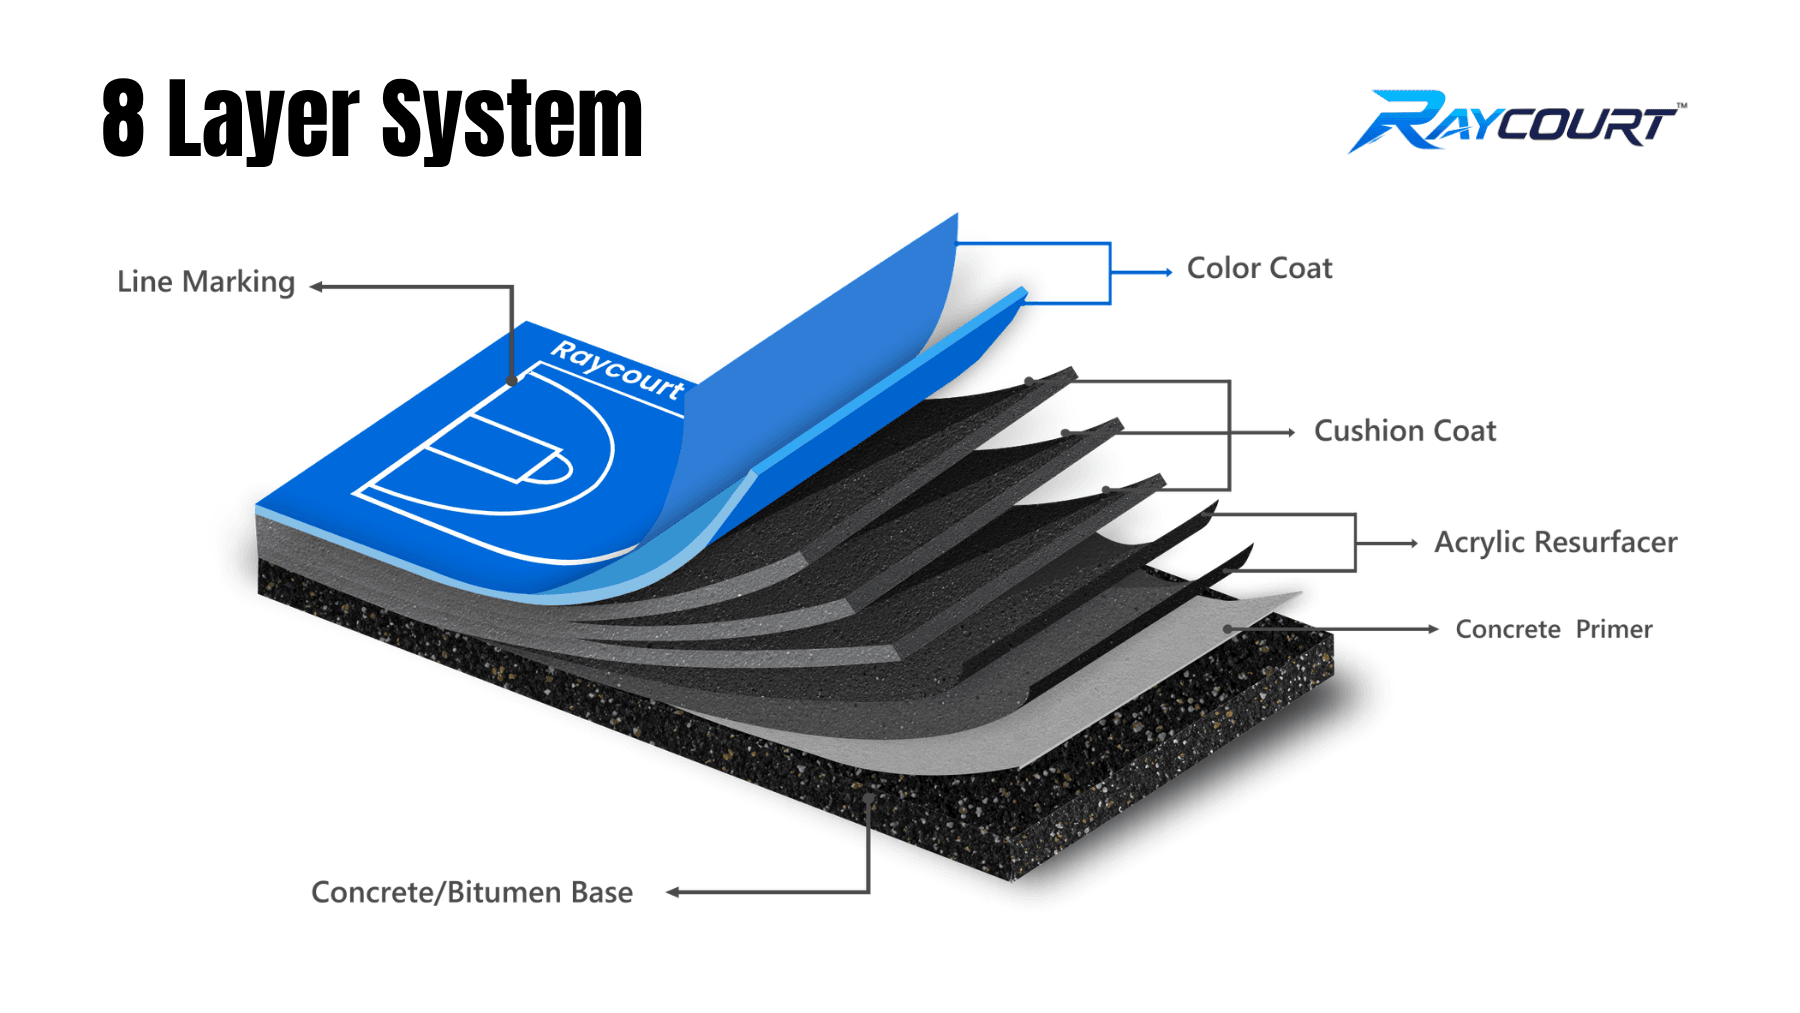
Understanding the layers helps you speak confidently with your flooring applicator. Each layer plays a specific role. Skipping or thinning any layer weakens the system.
Layer 1: Surface Preparation
Preparation comes first. Crews clean the base thoroughly, remove dust and oil, and repair cracks. They also fill low spots and patch any damaged areas. Proper preparation gives every later layer a clean foundation to grip. Many coating failures trace back to poor preparation, so this step deserves care.
Layer 2: Primer
The primer bonds the acrylic system to the base. It penetrates the pores of concrete or asphalt and creates a strong anchor. A good primer reduces the risk of peeling and blistering. It also seals the base against moisture movement.
Layer 3: Resurfacer or Filler Coats
Resurfacer coats smooth the texture of the base. They fill microscopic voids and level small imperfections. Crews apply them in multiple thin passes. This step creates the even, consistent texture that gives the court its predictable ball response.
Layer 4: Cushion Layers (Optional)
Some projects add cushion layers. These layers contain rubber or specialized fillers. They absorb impact and reduce strain on players’ knees and ankles. Academies and schools that run long training sessions often choose them. Cushioned systems add comfort without changing the way the ball bounces.
Layer 5: Color Coats
Color coats give the court its final look. Crews apply at least two coats for rich, uniform color. These coats also add texture and slip resistance. Quality pigments resist fading and chalking, so your court keeps its vivid appearance for years.
Layer 6: Line Markings
Finally, crews mark the lines with specialized acrylic line paint. They measure carefully and use tape and templates to keep the lines crisp. Clean edges and accurate dimensions give the court its professional finish.
A Quick Summary of the Process
- Clean and repair the base.
- Apply the primer.
- Apply resurfacer coats.
- Add cushion layers if the project calls for them.
- Apply color coats.
- Mark and paint the lines.
- Allow the surface to cure before play.
Expert Tip: Weather matters during application. Crews should avoid coating when rain threatens or when surface temperatures run extremely high. Good timing leads to better bonding and a smoother finish.
Common Outdoor Basketball Court Questions
How Long Should I Wait Before Playing on a New Acrylic Court?
Patience pays off after the final coat. The acrylic needs time to cure fully, and curing depends on temperature, humidity and the number of layers. Light foot traffic may become possible fairly soon. Heavy play, hard dribbling and hoop installation should wait until your applicator confirms the surface has cured. Rushing this step can leave footprints, scuffs or soft spots in the new coating.
Always follow the curing guidance from your flooring applicator and the material manufacturer. They know the exact product and conditions on your site.
Can I Build an Outdoor Basketball Court Over an Existing Surface?
Often you can. Many old courts, driveways and parking areas serve as bases for new acrylic systems. However, the existing surface must be sound, stable and well-drained. Large cracks, soft spots and heaving signal base trouble that no coating can cure. Inspect the existing surface carefully. If it passes, crews can clean, repair and coat it. If it fails, rebuild the base first.
Which Color Works Best for an Outdoor Basketball Court?
Color affects both appearance and comfort. Lighter shades reflect more heat, so they feel cooler on sunny days. Darker shades absorb heat but look striking and hide dirt well. Many designers pick a strong color for the key and a contrasting shade for the surrounding run-off area. This approach helps players read the court quickly.
Think about branding, too. Schools often match court colors to their uniforms. Clubs often match team colors. Raycourt offers a wide palette so you can design a court that looks the way you imagine it.
Is Acrylic Slippery When Wet?
A properly textured acrylic surface keeps good traction when damp. The color coats contain fine silica or grit that adds grip. However, standing water, algae or dust can still create slick spots. Good drainage and regular cleaning keep the surface safe. If you notice slick areas, investigate the cause. Poor drainage or a worn coating usually explains the problem.
Ready to build a court that performs for years to come?
Connect with Raycourt for sports flooring systems built for your project.
Line Markings and Color Planning
The Role of Lines in an Outdoor Basketball Court
Lines tell players where the rules apply. They mark the boundary, the key, the three-point arc, the free-throw line and the center circle. Referees rely on them for every call. For this reason, lines must stay clear, accurate and visible.
Standard lines measure five centimeters wide. Crews usually paint them in white, though a bright contrasting color works too. White gives the sharpest contrast against most court colors. It also keeps the court looking classic and professional.
Marking Each Court Element
Here are the main elements your crew will mark:
- Boundary lines around the full court.
- Center line that divides the court into two halves.
- Center circle with a 1.80 meter radius.
- Free-throw lines and lane boundaries at both ends.
- Three-point lines with straight sections near the sidelines.
- Restricted area arcs under each basket.
- No-charge semicircles that guide defensive play.
Each element has exact dimensions in the FIBA rulebook. Give the rulebook to your marking crew and double-check the layout before painting.
Multi-Sport Line Planning
Shared courts need careful line design. Each sport receives its own color so players can follow the right lines. For example, a basketball court might use white. A volleyball layout might use yellow. A pickleball layout might use blue or another contrasting shade.
Limit the number of overlapping sports to avoid a confusing maze of lines. Most facilities find that two or three sports on one surface remain readable. More than that can overwhelm players.
Color Combinations That Work
Strong contrast improves visibility and style. Here are a few combinations that work well:
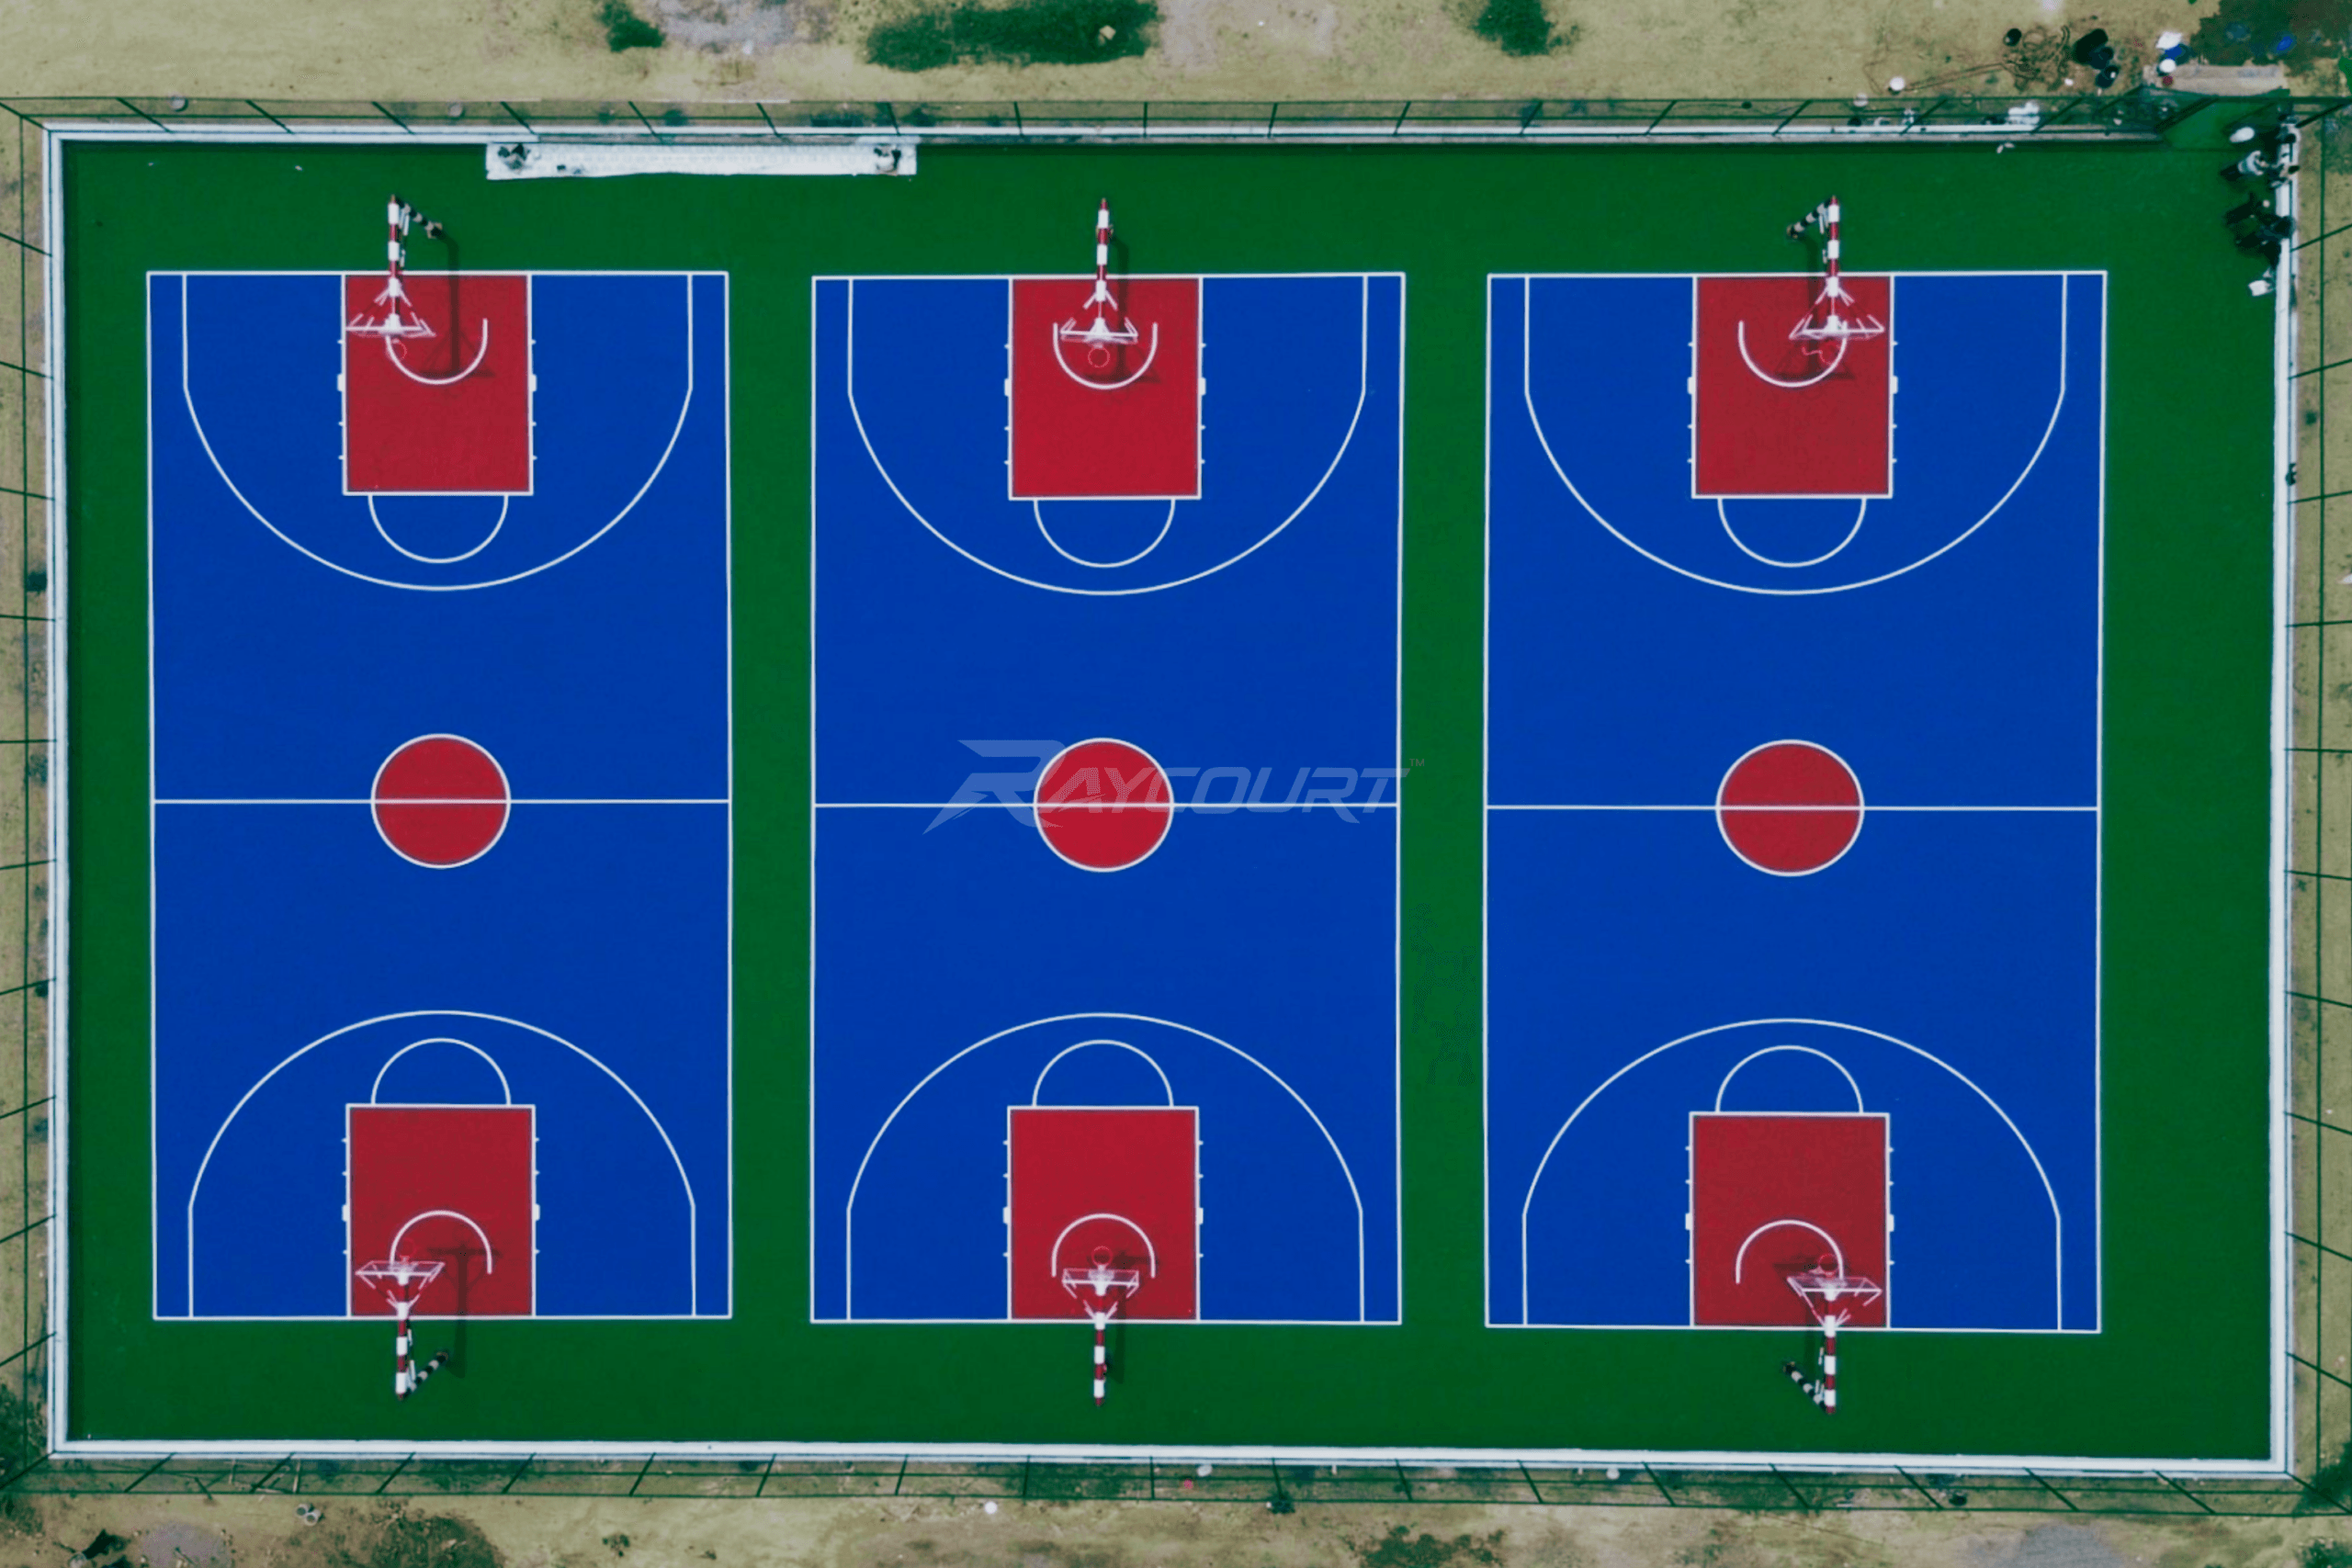
- Blue court with a green run-off. Cool tones give a calm, professional look.
- Red key with a gray court. Warm accents highlight the scoring zone.
- Green court with a light green run-off. This choice blends naturally with outdoor settings.
- Team color key with a neutral court. This design reinforces branding and keeps the court balanced.
Consider local weather too. In very hot climates, lighter colors reduce surface heat. In cooler climates, darker colors can feel inviting. Your applicator can show you sample swatches to guide the decision.
Hoops, Backboards, Poles and Other Court Equipment
Choosing the Right Basketball System
Equipment shapes both safety and gameplay. An outdoor basketball court needs hoops that withstand weather and heavy use. Look for sturdy poles, strong backboards and reliable rims.
Several types of systems exist:
- Fixed-pole systems anchor directly in the ground and offer maximum stability.
- Portable systems sit on a weighted base and suit casual use.
- Wall-mounted systems attach to a building and save floor space.
- Adjustable-height systems let younger players practice at lower rims.
Each system fits a different type of facility. Schools often choose adjustable systems for flexibility. Academies choose fixed systems for stability. Residential complexes may choose either, depending on space.
Backboard Material and Rim Strength
Backboards come in glass, acrylic, polycarbonate and steel. Tempered glass gives the most authentic rebound and suits competitive play. Acrylic and polycarbonate resist impact and weather well for recreational courts. Steel or perforated metal survives public areas where vandalism is a concern.
Rims should flex under pressure. Breakaway rims absorb dunks and reduce stress on the backboard. A strong rim also protects the pole from damage over time.
Foundations for Poles
Pole foundations need as much care as the court base. Engineers must plan the footing size, depth and reinforcement. Poorly built foundations cause leaning poles and shaky hoops. Coordinate with your civil contractor so the footings integrate smoothly with the base and the acrylic surface.
Ask the contractor to place sleeves or anchor bolts while the base still sits open. This planning avoids drilling through a new surface later.
Fencing, Netting and Barriers
Fencing keeps balls on the court and protects people nearby. Chain-link or welded mesh fences work well. Heights vary, but many designers choose fencing that rises several meters behind the baskets and lower fencing along the sides.
Add gates at convenient spots. Also add padding around any hard structure that sits near the run-off. Padding protects players if they collide with posts or walls.
Floodlighting for Evening Play
Lighting extends the usable hours of your court. Good lighting provides even coverage and low glare. Poor lighting creates shadows and eye strain. LED fixtures save energy and last long, so they have become the standard choice.
Place lights so they illuminate the full court and the run-off. Avoid positioning lights directly behind the hoop, where they could blind shooters. A lighting specialist can design a layout that meets your needs.
Expert Tip: Plan your electrical trenches before the base pour. Running conduit under a finished court forces crews to cut into the slab. Early planning keeps your acrylic surface whole.
Ready to build a court that performs for years to come?
Connect with Raycourt for sports flooring systems built for your project.
How Climate Affects Your Outdoor Basketball Court
Hot and Sunny Regions
Strong sun heats the court surface and fades pigments. Acrylic systems that include UV-stable pigments hold their color better. Lighter shades reflect more heat, so players stay more comfortable. Regular washing also removes dust that traps heat.
Schedule application during cooler parts of the day when possible. Surface temperatures affect how coatings dry and bond. Your applicator will know the best conditions for the material they use.
Monsoon and High-Rainfall Regions
Monsoon climates stress surfaces with constant moisture. Drainage matters most here. A well-sloped surface and clear drains keep water from lingering. Choose a textured finish that holds grip when wet. Also schedule major surfacing work for dry months, since moisture during application harms bonding.
Algae can grow in damp, shaded areas. Clean the surface regularly and trim any overhanging branches. These simple steps keep the court safe and attractive during wet seasons.
Cold and Variable Regions
Freeze and thaw cycles can crack any base. Water enters tiny openings, freezes, expands and widens the crack. Seal cracks promptly, and ensure drainage keeps water out of the base. Acrylic systems with flexible binders handle small movements more gracefully.
Coastal and High-Humidity Areas
Salt air and humidity speed up wear on metal parts. Specify corrosion-resistant poles, fasteners and fencing. Wash the court regularly to remove salt residue. The acrylic itself resists these conditions well, but the surrounding hardware needs protection.
Maintaining Your Outdoor Basketball Court
Why Regular Care Matters
Even the best outdoor basketball court needs care. Routine maintenance preserves the surface, prevents small issues from growing and keeps the court safe. A simple schedule extends the life of the acrylic and protects the court for every player who uses it.
Daily and Weekly Care
Start with the basics. Sweep or blow away leaves, dust and debris regularly. Debris scratches the surface and traps moisture. Remove any trash, spilled drinks or chewing gum quickly. Check that drains flow freely, especially after storms.
Simple habits like these prevent most problems. Staff or volunteers can handle them with little training.
Monthly and Seasonal Care
Wash the court every few weeks with water and a soft brush or low-pressure washer. Use a mild detergent for stubborn spots. Avoid harsh chemicals, which can dull the color and weaken the coating. Rinse thoroughly so no residue remains.
Inspect the court each season. Look for cracks, bubbles, peeling, fading or worn lines. Also check nets, rims, backboards and fencing. Fix small issues quickly, because they grow fast under heavy use.
Maintenance Checklist
Use this checklist to stay on track:
- Sweep the surface weekly, or daily on busy courts.
- Clear drains and channels before each rainy season.
- Wash the court on a regular schedule.
- Inspect for cracks and fill them early.
- Check hoops, nets and poles for looseness or rust.
- Review line markings and touch them up as needed.
- Trim trees and vegetation near the court.
- Keep sharp objects, heavy vehicles and chemicals off the surface.
When to Recoat
Acrylic surfaces gradually wear with sun, rain and play. Eventually, the color fades and the texture smooths out. At that point, a recoat restores appearance and traction. Recoating takes far less effort than rebuilding, and it refreshes the court quickly.
The timing varies with climate, usage and the quality of the original system. Heavy-use courts need attention sooner. Lightly used courts can last longer. Watch for visible wear patterns around the key and baselines. These areas show aging first.
Repairing Cracks and Damage
Small cracks need prompt attention. Crews clean the crack, fill it with a flexible repair material and then recoat the area. Larger structural cracks need professional assessment. Ignoring them lets water reach the base and cause bigger problems.
Expert Tip: Keep leftover material and color records from your original project. Matching color later becomes much easier when you know the exact product and shade you used before.
Common Mistakes to Avoid When Building an Outdoor Basketball Court
Experience shows that the same errors appear again and again. Avoid them, and your project will run smoothly.
Skipping the Soil Test
Some owners rush straight to construction. Then the base settles unevenly and cracks within a season. A soil test identifies weak ground early. It lets engineers design the right sub-base from the start.
Ignoring Drainage
Flat courts hold water. Water breaks coatings and breeds algae. Always design a slope and a drainage path before pouring the base.
Coating a Base That Has Not Cured
Concrete needs time. Coating too early traps moisture and causes blisters. Wait for the full curing period, and test moisture levels if your applicator asks.
Using Too Few Coats
Thin coatings wear out quickly. A proper acrylic system needs enough layers to reach the right thickness and durability. Follow the manufacturer’s guidelines for each layer.
Choosing Poor-Quality Hoops
Weak poles sway. Cheap rims bend. A hoop failure hurts players and shortens the life of the court. Give quality equipment from reliable suppliers your full attention.
Forgetting Run-Off Space
Tight sidelines cause collisions. Always plan the clear zone around the court, even if it means shrinking the overall layout slightly.
Neglecting Maintenance
Even a premium court fails without care. Build a maintenance plan on day one, and assign someone to follow it.
Planning Checklist for Your Outdoor Basketball Court Project
Use this step-by-step checklist to organize your project from idea to opening day.
- Define the purpose. Decide whether the court serves recreation, training or competition.
- Choose the layout. Pick a full court, half court or multi-sport design.
- Select the site. Evaluate sun direction, soil, access and surrounding trees.
- Confirm the rulebook. Decide which federation standards apply.
- Commission the soil test. Let engineers design the right base.
- Design drainage and slope. Plan channels, outlets and grading.
- Build the base. Hire a qualified civil contractor for concrete or asphalt.
- Allow proper curing. Wait the full recommended time before coating.
- Choose the acrylic system. Work with your flooring applicator and a trusted material manufacturer.
- Select colors and line layout. Match them to branding and use.
- Install the equipment. Add hoops, fencing and lighting with safe foundations.
- Set a maintenance plan. Schedule cleaning, inspection and recoating.
Following these steps in order keeps your project organized and reduces surprises.
Ready to build a court that performs for years to come?
Connect with Raycourt for sports flooring systems built for your project.
Working with Raycourt on Your Outdoor Basketball Court
What Raycourt Does
Raycourt manufactures synthetic acrylic sports court flooring material. We focus on creating consistent, high-quality materials that perform on real courts under real conditions. We do not install courts. Instead, we supply materials that your trusted flooring applicator or contractor uses on site.
This separation benefits you. Our team concentrates on product quality, testing and technical support. Your installation partner concentrates on craftsmanship. Together, you get a court built on specialist expertise at every stage.
How We Support Your Project
We support project owners, architects, consultants and contractors in several ways:
- We explain the layers and materials that suit your court.
- We share technical guidance on base preparation and surface readiness.
- We offer a wide range of colors to match your design.
- We help your team understand curing, application conditions and maintenance.
- We provide materials that deliver consistent bounce, grip and durability.
Why Project Owners Trust Raycourt
Trust comes from consistent performance. Raycourt flooring holds up under sun, rain and heavy use. Customers also find that our team answers questions clearly and honestly. Furthermore, our materials carry ITF Court Pace Classified recognition, which signals a commitment to measured surface quality. Because of this reliability, schools, academies, clubs and developers across many regions choose Raycourt for their outdoor courts.
If you plan an outdoor basketball court, start the conversation early. Share your site details, your goals and your timeline. Our team will guide you toward the right acrylic system for your needs.
Frequently Asked Questions
Synthetic acrylic is the best all-round surface for most outdoor basketball courts. It delivers a consistent bounce, strong traction and excellent UV and weather resistance. It also comes in many colors and allows easy recoating, so the court stays fresh for years.
A regulation FIBA outdoor basketball court measures 28 meters by 15 meters. Add roughly two meters of run-off space on every side for safe play. Half courts measure about 14 by 15 meters and suit practice and casual games.
Both bases work well when crews build them correctly. Concrete gives a rigid, long-lasting platform but needs a full curing period. Asphalt tolerates slight ground movement and cures faster, though it needs careful rolling and preparation. Your soil conditions, schedule and contractor expertise should guide the choice.
Most designers use a slope of about one percent, or roughly ten millimeters per meter. This gentle fall moves rainwater off the court without affecting gameplay. Pair the slope with edge drains or perimeter channels to carry water away safely.
Sweep and inspect the court regularly, and wash it every few weeks. Recoat when color fades, texture wears down or lines lose clarity. Heavy-use courts and hot or wet climates may need attention sooner than lightly used courts.
Conclusion: Build an Outdoor Basketball Court That Lasts
A successful outdoor basketball court blends careful planning, strong construction and quality materials. Accurate dimensions give players a fair, safe space. A well-built base and smart drainage protect the court from water and movement. A synthetic acrylic surface then adds grip, comfort, color and weather resistance that outdoor play demands.
Equipment, lighting and fencing complete the picture. Meanwhile, a simple maintenance routine keeps everything working for years. When you follow each step in this guide, you give players a court that performs well and looks great.
Raycourt stands ready to support your project with dependable acrylic flooring material and clear technical guidance. Contact our team today, share your plans and take the first step toward an outdoor basketball court that your community will enjoy for a long time.
Ready to build a court that performs for years to come?
Connect with Raycourt for sports flooring systems built for your project.